In the pursuit of salon-quality results at home, we often focus on the what—the masks, the expensive serums, and the botanical oils. But in 2026, the elite world of hair care has shifted its focus to the how. Specifically, how the physics of temperature and pH can be manipulated to force product penetration and lock in structural integrity. This is where mastering how to seal hair cuticle comes into play—a biohacking technique that uses thermodynamic principles to dictate how your hair behaves in any environment.
Most people are aware that warm water opens the hair cuticle and cold water closes it. However, a true professional approach to how to seal hair cuticle goes far beyond a quick “cold rinse” at the end of your shower. It is a calculated sequence of temperature shifts, chemical balance, and mechanical handling that ensures your hair follicles are receptive to nutrients and that your hair shaft is hermetically sealed. If you want to eliminate frizz forever and achieve mirror-like shine, understanding the mechanics of how to seal hair cuticle is the missing link in your beauty arsenal.
???? The Anatomy of an Open vs. Sealed Cuticle
To effectively learn how to seal hair cuticle, you must first visualize its microscopic structure. Your hair is not a solid, smooth tube; it is composed of overlapping scales made of hard keratin protein, much like the shingles on a roof or the scales on a pinecone.
When the cuticle is “open,” these scales flare outward. This state is necessary for cleaning and treatment, but if left open, it leads to “hygral fatigue”—the damage caused by the constant swelling and contracting of the hair fiber. When the scales are raised, light hits the surface and is absorbed or scattered in a million directions, which the human eye perceives as a matte, dull, or frizzy finish.
When you master how to seal hair cuticle, you are essentially forcing these scales to lie flat and overlap perfectly. A sealed cuticle creates a smooth, uniform surface that reflects light in a singular direction (specular reflection), creating that “glass hair” effect. Furthermore, a sealed cuticle acts as a waterproof barrier, preventing humidity from entering the cortex and causing the hair to “poof” or frizz.
| State | Microscopic View | Visual Appearance | Texture | Vulnerability |
| Open Cuticle | Raised, flared keratin scales. | Matte, dull, “rusty” look. | Rough, prone to tangles. | High (loses moisture/color). |
| Sealed Cuticle | Flat, overlapping “shingles.” | High shine, reflective. | Silky, glides through fingers. | Low (locks in hydration). |
????️ Phase 1: The “Thermal Gateway” (The Warm Prep)
It sounds counterintuitive, but the first step in learning how to seal hair cuticle is actually knowing when and how to open it. You cannot effectively seal a cuticle that hasn’t been properly prepped to receive moisture. If you try to seal “dry” hair, you are merely locking in dehydration.
Start your routine with warm water (approx. 38°C). This thermal energy causes the hair to swell slightly, lifting the cuticle scales through thermal expansion. This is your “Thermal Gateway.” In this state, the hair is highly vulnerable but also highly receptive. Warmth allows the surfactants in your shampoo to glide under the scales and remove deep-seated debris, pollutants, and product buildup.
Expert Warning: If the water temperature exceeds 41°C, you risk denaturing the hair proteins and causing scalp inflammation. The goal of a how to seal hair cuticle routine is controlled expansion, not heat damage.
???? Phase 2: Nutrient Infusion & The “Internal Bungee Cord”
Once the cuticles are open, your hair is like a sponge. This is the moment to apply your high-performance treatments. Because you are following a specific protocol on how to seal hair cuticle, you should focus on products that reinforce the “internal bungee cord” of the hair.
If you are struggling with how to repair damaged hair, skipping this warm infusion phase means your expensive masks are likely just sitting on the surface. During this phase, the use of a thermal cap or a steamed towel is highly recommended. The steam provides “moist heat,” which keeps the keratin scales flexible and raised just long enough for hydrolyzed proteins and vitamins for healthy hair to migrate into the cortex.
The ‘Flash-Freeze’ technique is most effective when you have high-performance nutrients inside the cortex. If you’ve just used a DIY rinse—like learning how to make rice water for hair growth—sealing the cuticle is mandatory to keep that inositol locked in.
The Porosity Factor: How Long Should You Wait?
The time required for this phase depends entirely on your hair’s porosity—the ability of your hair to absorb and retain moisture.
- Low Porosity (Difficult to Open): Your cuticles are naturally tight. You need at least 15 minutes of warmth to “force” the gateway open before the sealing process can begin.
- High Porosity (Stuck Open): Your cuticles are damaged and flared. You only need 3–5 minutes of infusion, but your sealing phase (Phase 3) must be twice as long to ensure they stay down.
❄️ Phase 3: The “Flash-Freeze” (The Master Seal)
This is the most critical part of learning how to seal hair cuticle. After you have allowed your treatment to penetrate, you must apply a sudden, drastic drop in temperature. In the biohacking world, this is known as Thermal Contrast.
By rinsing with cold water (ideally between 15°C and 20°C), you trigger an immediate physical reaction. The keratin scales, which were expanded by the warmth, rapidly contract and snap shut. This temperature shock is the most effective way to solve the mystery of how to seal hair cuticle without relying solely on heavy chemicals.
Why the Cold Rinse is Non-Negotiable:
- Traps Actives: It “locks” the nourishing ingredients inside the cortex before they can be washed away by excess water.
- Prevents Oxidation: For colored hair, cold water prevents the dye molecules from escaping.
- Instant Gloss: It flattens the surface texture immediately, providing a tactile difference you can feel while the hair is still wet.
???? Phase 4: The pH Factor (The Chemical Seal)
While temperature is a powerful tool, you cannot master how to seal hair cuticle without understanding pH balance. The hair cuticle is highly sensitive to the acidity or alkalinity of its environment.
- Alkaline (pH 7.1 – 14): Anything alkaline (like most baking soda “hacks” or harsh soaps) forces the cuticle to flare open and stay open.
- Acidic (pH 3.5 – 5.5): An acidic environment causes the cuticle to contract and lie flat.
To reinforce your thermal seal, always finish with an acidic rinse. You can use a dedicated pH-balancing sealer or a DIY version (1 tablespoon of apple cider vinegar in 2 cups of distilled water). This chemical contraction works in tandem with your “Flash-Freeze” to ensure that the cuticle remains closed even after the hair has warmed back up to room temperature.
????️ Phase 5: Directional Drying Physics
The challenge of how to seal hair cuticle doesn’t end when you leave the bathroom. In fact, the most common mistakes happen during the drying process. As water evaporates from the hair, the hair becomes lighter and the cuticle can easily “ruffle” again.
1. The Microfiber Rule
Never, under any circumstances, rub your hair with a standard cotton towel. Cotton fibers are too large and rough; they act like sandpaper against your delicate keratin scales. Instead, use a microfiber towel or an old silk t-shirt. Blot the hair gently. Rubbing is the fastest way to undo your how to seal hair cuticle routine.
2. The Blow-Dry Direction
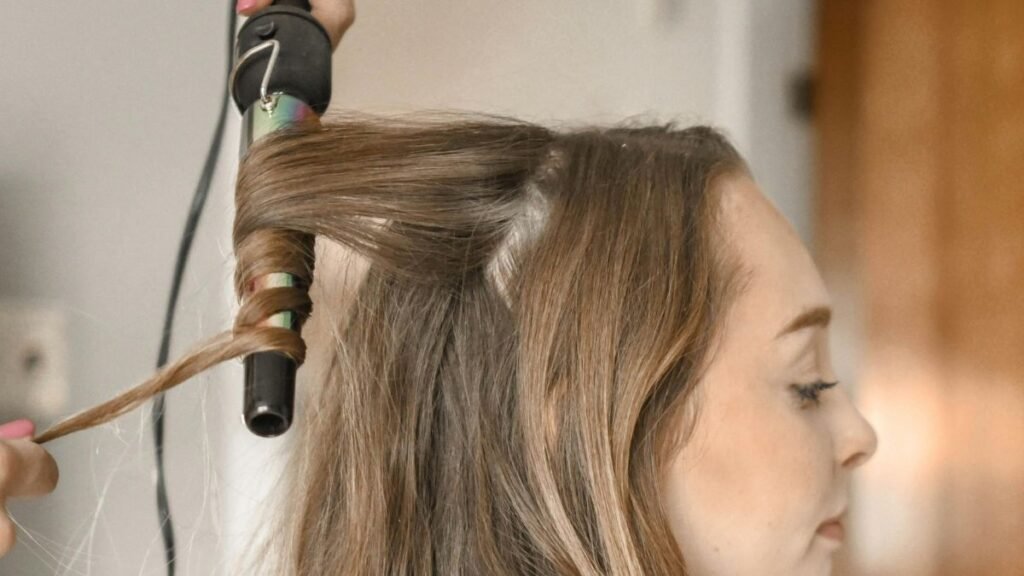
If you use a hairdryer, the angle of the nozzle is your secret weapon. Most people point the dryer randomly. To keep the cuticle sealed, you must always point the airflow downward, from the roots toward the ends. This airflow mimics the natural “shingle” direction of the scales, smoothing them down as the hair dries.
3. The Cool Shot Button
Every professional hairdryer has a “Cool Shot” button. In a how to seal hair cuticle routine, this button is not an optional extra—it is the final step. Once a section of hair is dry and shaped, blast it with cold air for 15 seconds. This “sets” the keratin in its new, flat position and prevents environmental humidity from re-opening the scales.
4. The Overnight Lipid Seal
Even after using the cool shot to set your hair, the friction from your pillowcase can “rough up” the cuticle during the night. To maintain that mirror-like shine and prevent moisture loss, incorporating a Hair Slugging Routine is the ultimate biohack. By coating your ends in a protective lipid barrier before bed, you ensure the cuticle remains flat and sealed until your next wash day.
???? Nighttime Biohacking: The Circadian Seal
In 2026, we know that hair health is tied to our internal biological clocks. If you follow the circadian hair clock, you know that our body temperature and scalp moisture levels fluctuate during the night.
When we sleep, the friction between our hair and the pillow can physically lift the cuticle scales, leading to “morning frizz.” To prevent this, your nighttime how to seal hair cuticle strategy should include:
- A “Dry” Cold Blast: Before bed, run a hairdryer on the cold setting through your hair for 60 seconds to ensure any lingering humidity is gone and the cuticles are tight.
- Surface Tension Control: Sleep on a silk or satin pillowcase. Unlike cotton, these fabrics have a low friction coefficient, meaning they won’t “catch” on your cuticle scales and pull them open during the night.
????️ The Ultimate “Cuticle Sealing” Protocol Table
| Step | Action | Tool | Scientific Goal |
| 1. The Open | Warm Water Rinse | 38°C Water | Thermal expansion of keratin scales. |
| 2. The Clean | pH-Balanced Shampoo | Sulfate-free | Remove debris without over-stripping. |
| 3. The Feed | Deep Treatment Mask | Thermal Cap | Nutrient migration into the cortex. |
| 4. The Seal | Flash-Freeze Rinse | 15°C Cold Water | Rapid mechanical contraction. |
| 5. The Acidify | pH Sealer / ACV Rinse | pH 4.5 Product | Chemical tightening of the cuticle. |
| 6. The Finish | Directional Drying | Dryer + Cool Shot | Set the scales in a flat position. |
⚠️ Common Saboteurs: What “Unseals” Your Cuticle?
Even if you follow this guide on how to seal hair cuticle, certain environmental factors can “sabotage” your results:
- UV Radiation: Sunlight breaks the disulfide bonds and the lipid layer that helps keep the cuticle scales glued down. Always use a UV-protective mist if you spend time outdoors.
- High Humidity: If your cuticle isn’t 100% sealed, water molecules from the air will enter the hair shaft, causing it to swell and “ruffle” the scales. This is why the cold-air blast is so vital.
- Hard Water: Minerals like calcium and magnesium can get trapped under the scales, acting like tiny rocks that prevent the cuticle from laying flat. If your hair feels “tacky” despite a cold rinse, you may need a chelating treatment.
- Excessive Brushing: Brushing wet, open hair is like trying to comb a pinecone while the scales are wet and soft. It causes “cuticle chipping,” which is permanent damage.
FAQ: Rapid Mastery of Cuticle Sealing
Can I use hot tools and still keep the cuticle sealed?
Yes, but only with a high-quality thermal protectant. Heat styling tools work by temporarily breaking hydrogen bonds to reshape the hair. Without a “sealing” step (like a cold shot afterward), your hair will remain porous and prone to snapping.
How to seal hair cuticle if I have very fine hair?
Fine hair is easily weighed down. Instead of heavy oils, use a lightweight acidic rinse and focus heavily on the “Flash-Freeze” cold water technique. Your hair will get the shine without the “grease trap” effect.
Does the “cold water” technique really work or is it a myth?
It is 100% based on physics. Keratin is a protein that reacts to temperature. While it won’t “repair” a broken hair, it is the most consistent, non-chemical way to ensure the scales lie flat.
Conclusion: The Ultimate Habit for Shiny Hair
Mastering how to seal hair cuticle is a fundamental skill for anyone serious about hair care in 2026. It is the final, essential step that turns a good routine into a great one. By using the power of Thermal Contrast—warmth to open and cold to close—you work with your hair’s biology rather than against it.
Stop relying on heavy silicones to hide a damaged cuticle. Instead, use these biohacking techniques to create a natural, lasting seal that radiates health from the inside out. At Gloss Wellness, we believe that the best hair care isn’t just about what you put on your hair, but how you treat the biological structure of your hair. Now that you know how to seal hair cuticle, your journey to perfect, glass-like hair is officially complete.