Hey gorgeous! If you’ve been dreaming of thicker, longer, and healthier hair, you’ve probably seen the rosemary craze taking over the internet. But let me tell you, this isn’t just another passing social media trend. As someone who obsesses over hair science and natural remedies, I can tell you that homemade rosemary oil for hair growth is one of the most powerful, effective, and affordable secrets you can add to your routine.
Whether you are struggling with thinning edges, slow growth, or you just want to boost your hair’s overall density, making your own homemade rosemary oil for hair growth is a total game-changer. In this massive guide, we are going to dive deep into the science, the recipe, and the secret tips to make this work for your specific hair type.
The Science: Why Rosemary is a Hair Growth Powerhouse
Before we get our hands messy in the kitchen, let’s talk about the why. We aren’t just putting kitchen herbs on our heads for fun! The effectiveness of homemade rosemary oil for hair growth comes down to a specific compound called carnosic acid.
Scientific studies have shown that carnosic acid has the unique ability to heal tissue and nerve damage in the scalp. When your scalp is healthy and your blood circulation is firing on all cylinders, your hair follicles get the “green light” to stay in the growth phase longer.
Rosemary vs. Minoxidil: What the Research Says
In a famous 2015 clinical study, rosemary oil was tested directly against Minoxidil 2% (a common hair loss medication). After six months, both groups saw the exact same amount of new hair growth! The best part? The rosemary group had significantly less scalp itching and irritation. This is the biggest reason why choosing homemade rosemary oil for hair growth is a superior, natural choice for your long-term wellness.
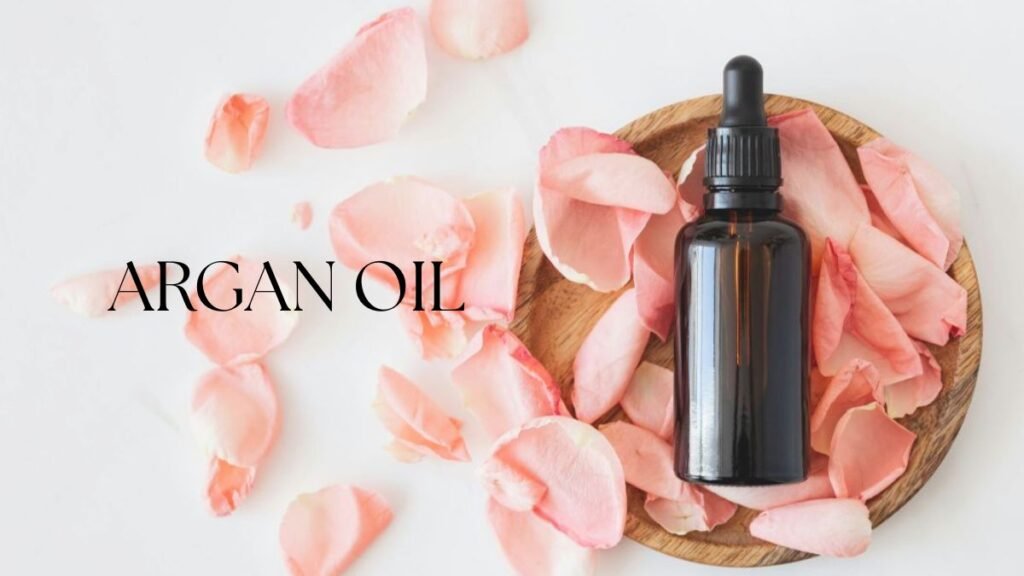
Choosing Your Base: The Carrier Oil Matchmaker
You can’t apply pure rosemary essential oil directly to your skin—it’s too strong! You need a “carrier” oil to deliver those nutrients safely. Since we are making a homemade rosemary oil for hair growth, picking the right base for your hair porosity and type is the secret to success.
Quick Reference: Finding Your Perfect Match
| Hair Type / Need | Best Carrier Oil | Why it works for you |
| Dry & High Porosity | Extra Virgin Olive Oil | Deeply nourishing and creates a moisture seal. |
| Fine or Oily Hair | Jojoba Oil | Mimics your scalp’s natural sebum; won’t clog pores. |
| Extreme Growth Boost | Castor Oil | Packed with ricinoleic acid for massive thickness. |
| Dull & Lifeless Hair | Sweet Almond Oil | High in Vitamin E for a mirror-like shine. |
| Sensitive Scalp | Grapeseed Oil | Super lightweight and ultra-soothing. |
Using the right base ensures your homemade rosemary oil for hair growth penetrates the follicle without leaving your hair looking like a greasy mess.
Unsure about your hair’s needs? Check out our The Guide to Mastering High Porosity Hair to see if these heavy oils are right for you.
The Master Recipe: How to Make Your Own Liquid Gold
Ready to become a DIY beauty queen? Making homemade rosemary oil for hair growth is a therapeutic process. There are two main ways to do it, but I’m going to teach you the “Double Boiler Method”—it’s the fastest and most effective way to extract all the nutrients without burning the plant.
What You’ll Need:
- Fresh Rosemary: 5 to 6 large sprigs (fresh is best for potency!).
- Carrier Oil: 1 cup of the oil you chose from the table above.
- Glass Jar: A sterilized, 100% dry jar for the infusion.
- Dark Dropper Bottle: For long-term storage.
Step-by-Step Instructions:
- Preparation is Key: Wash your rosemary sprigs and let them air dry completely. This is the most important step! If there is even a drop of water on the leaves, your homemade rosemary oil for hair growth will develop mold and go bad.
- Bruise the Leaves: Lightly crush the rosemary leaves with a spoon to help release the natural oils and antioxidants.
- The Gentle Infusion: Place the rosemary and your carrier oil in a heat-safe glass bowl. Place the bowl over a pot of simmering water (Double Boiler). Let it sit on the lowest heat for about 2 to 3 hours.
- Cooling Down: Turn off the heat and let the oil reach room temperature.
- Storage: Strain the oil through a cheesecloth into your dark glass bottle. Your very own homemade rosemary oil for hair growth is now ready!
Troubleshooting Your Homemade Rosemary Oil: What to Do if Things Go Wrong
Even with a perfect recipe, nature can be unpredictable. When making homemade rosemary oil for hair growth, you might encounter a few hiccups.
- Cloudy Oil: If your oil looks cloudy after a few days, it usually means there was a tiny bit of moisture left in the rosemary. Don’t panic! You can still use it, but you must use it quickly (within a week) and keep it in the fridge. To prevent this next time, ensure your herbs are bone-dry.
- Strong Herbal Smell: Some people find the scent of homemade rosemary oil for hair growth a bit too medicinal. You can balance this by adding 5 drops of Lavender or Peppermint essential oil. Peppermint actually adds an extra cooling sensation that further stimulates blood flow!
- Color Changes: If your oil turns a very dark amber, it’s a sign of a successful, deep infusion. However, if it smells “burnt,” your heat was too high. Always use the lowest setting on your stove.
Scalp Care 101: Preparing Your Canvas
Think of your scalp like a garden. You wouldn’t plant seeds in dry, hardened soil, right? For your homemade rosemary oil for hair growth to reach the roots, your scalp needs to be “open” and ready.
If you use a lot of dry shampoo or heavy styling products, you likely have “product buildup” on your scalp. This creates a barrier that prevents the homemade rosemary oil for hair growth from doing its job. I highly recommend using a clarifying shampoo or an Apple Cider Vinegar rinse once a month to “reset” your scalp before applying your oil. This “resets” your scalp environment, making it 10x more receptive to the nutrients in your homemade rosemary oil for hair growth.
If you struggle with excessive oil while using treatments, read our guide on The 10 Best Strategies for Scalp and Oily Hair for a balanced routine.
How to Apply Homemade Rosemary Oil for Hair Growth Like a Pro
Now that you have your potion, let’s talk about application. Consistency is more important than quantity!
The 3 Best Methods for Results:
- The 5-Minute Scalp Massage: This is the MVP move. Apply the homemade rosemary oil for hair growth directly to your roots. Use your fingertips (not nails!) to massage in circular motions. This physical stimulation wakes up dormant follicles.
- The Pre-Poo Treatment: Apply the oil from roots to ends 30 to 60 minutes before your shower. This protects your strands from the drying effects of shampooing.
- The Overnight Mask: If your hair is severely damaged, apply your homemade rosemary oil for hair growth before bed, wear a silk bonnet, and wash it out in the morning for deep restoration.
For those with severe breakage, combine this oil with our tips on How to Repair Damaged Hair to see faster results.
The Holistic Connection: Stress, Diet, and Rosemary
While homemade rosemary oil for hair growth is a miracle worker for your scalp, we must remember that hair health is holistic. Your hair follicles are the last part of your body to receive nutrients from the food you eat. Therefore, combining your homemade rosemary oil for hair growth with a diet rich in biotin, zinc, and iron will amplify your results significantly.
Moreover, stress is a major trigger for “Telogen Effluvium” (temporary hair shedding). Taking those 10 minutes a day to perform a slow scalp massage with your homemade rosemary oil for hair growth doesn’t just help your hair; it lowers your cortisol levels. This double-action approach—physical stimulation and mental relaxation—is what truly transforms your hair journey over time.
What to Expect: Your Growth Timeline
Let’s keep it real. No natural remedy works overnight. When you start using homemade rosemary oil for hair growth, your hair goes through a transition.
| Timeframe | What’s happening under the surface? | Your Goal |
| Month 1 | Reduced scalp inflammation and less daily shedding. | Consistency! |
| Month 2 | Improved hair texture and increased shine. | Keep massaging! |
| Month 3 | Small “baby hairs” start appearing around your hairline. | Don’t stop now! |
| Month 6 | Noticeable increase in overall volume and hair density. | Celebrate your progress! |
To reach these goals, try to use your homemade rosemary oil for hair growth at least 2 to 3 times per week.
Homemade Rosemary Oil for Hair Growth vs. Store-Bought Products
A common question in our community is: “Why should I spend time making homemade rosemary oil for hair growth when I can buy a bottle for $10 online?”
The answer lies in purity and potency. Most commercial serums contain “Isopropyl Myristate” or “Alcohol Denat” as fillers. These ingredients can actually dry out your hair over time. When you craft your own homemade rosemary oil for hair growth, you are using 100% active ingredients.
Furthermore, the “freshness” factor is unbeatable. Essential oils in stores often sit on shelves for months, losing their antioxidant power. Your homemade rosemary oil for hair growth is fresh, vibrant, and packed with the maximum amount of carnosic acid possible. Plus, it’s a much more sustainable and eco-friendly way to maintain your beauty routine.
A Trip Down Memory Lane: The History of Rosemary in Beauty
The use of homemade rosemary oil for hair growth isn’t a modern invention. Ancient Egyptians were known to use rosemary in their beauty rituals to strengthen their hair against the harsh desert sun. In ancient Greece, scholars would wear rosemary garlands in their hair to improve memory and concentration, believing the aroma stimulated the brain.
By using homemade rosemary oil for hair growth today, you are participating in a tradition of natural healing that has existed for thousands of years. It’s a beautiful way to disconnect from the “chemical-heavy” modern world and reconnect with the simple, potent wisdom of our ancestors. Every time you massage your homemade rosemary oil for hair growth into your roots, you are using a remedy that has been trusted by queens and healers throughout history.
Common Mistakes to Avoid ????
- Using it too much: More is not always better. Over-oiling can lead to clogged pores and scalp acne. Stick to the recommended 2-3 times a week.
- Using high heat: If you boil the oil, you kill the nutrients. Always keep the heat low when making your homemade rosemary oil for hair growth.
- Using it on a dirty scalp: Always try to apply the oil to a relatively clean scalp so it can actually reach the skin. The goal of homemade rosemary oil for hair growth is to nourish the follicle, not to leave a heavy film that attracts bacteria.
Frequently Asked Questions (FAQ)
Does homemade rosemary oil for hair growth expire?
Yes. Because it doesn’t contain heavy chemical preservatives, it usually lasts 2 to 3 months if kept in a cool, dark place. If it starts to smell like old crayons, it’s time to make a fresh batch.
Can I use dried rosemary instead of fresh?
Yes, you can! Dried rosemary is actually safer for beginners because there is zero risk of water causing mold. However, fresh rosemary contains slightly higher levels of the plant’s natural juices, which is why it’s the preferred choice for a premium homemade rosemary oil for hair growth.
Can I leave it in all day?
I wouldn’t recommend it if you’re going out, as it can attract dust and pollution. It’s best used as a treatment before washing.
Final Thoughts: Your Journey Starts Now!
Investing time into your hair health is the ultimate form of self-care. Crafting your own homemade rosemary oil for hair growth connects you with nature and gives you control over your beauty routine. It’s affordable, science-backed, and it actually works!
So, are you ready to see those curls thrive? Grab some fresh rosemary, choose your favorite carrier oil, and start your homemade rosemary oil for hair growth journey today. Your future self (and your long, thick hair) will thank you!
Your journey to healthy hair starts with consistency. If you enjoyed making this oil and want a protein boost after this oil treatment, try our Rice Water for Hair Growth rinse guide to complete your DIY hair routine!